Upload and Unzip a Tar File via Ssh
Restoring a fill-in from a Nothing file – like the ones generated past our downloadable backup feature – tin sometimes be a lengthy process. If you lot unzip a Nix file locally on your calculator before uploading the fill-in with SFTP, yous'll likely encounter a clogging because SFTP can only transfer a express number of files concurrently.
Fortunately, there is a faster method that tin can reduce the backup restore time significantly.
Instead of unzipping a ZIP file locally and uploading the unzipped folder, it's oftentimes faster to upload a Nada file to the server before unzipping it.
In this post, we'll explain how to unzip a file uploaded to a server using SSH. For our instance, we volition unzip a fill-in file on a Kinsta server, just the aforementioned technique can exist used to unzip whatsoever ZIP file on any Linux server.
Step one – Log In to Your Server with SSH
The get-go step is to log in to your server with SSH. To practise this, yous'll need an SSH client like the congenital-in Terminal app in macOS and Linux or the costless PuTTY client on Windows, and the SSH login details – IP address, username, countersign (optional), and port.
Password vs Public Key Authentication
You may be wondering why the password is optional. When logging in to your server with SSH, there are two authentication methods – password and public key authentication. The password authentication method uses a plainly text countersign.
Public key authentication is widely regarded as a more than secure alternative to password authentication. The public key hallmark method requires y'all to generate a cardinal pair – public key and private key. The public key is uploaded to the server, while the private key is stored locally on your computer. During the SSH login procedure, the cryptographic link between the two keys is verified to authenticate the user.
Kinsta users can upload SSH public keys in the MyKinsta dashboard. If y'all are using another server provider, we recommend taking a look at the relevant documentation on how to upload SSH keys to the server.
Now that nosotros've covered the differences between password and public key authentication, let'southward motility on to the SSH login process. For Kinsta users, SSH login details along with the full SSH concluding command are provided in the MyKinsta dashboard.
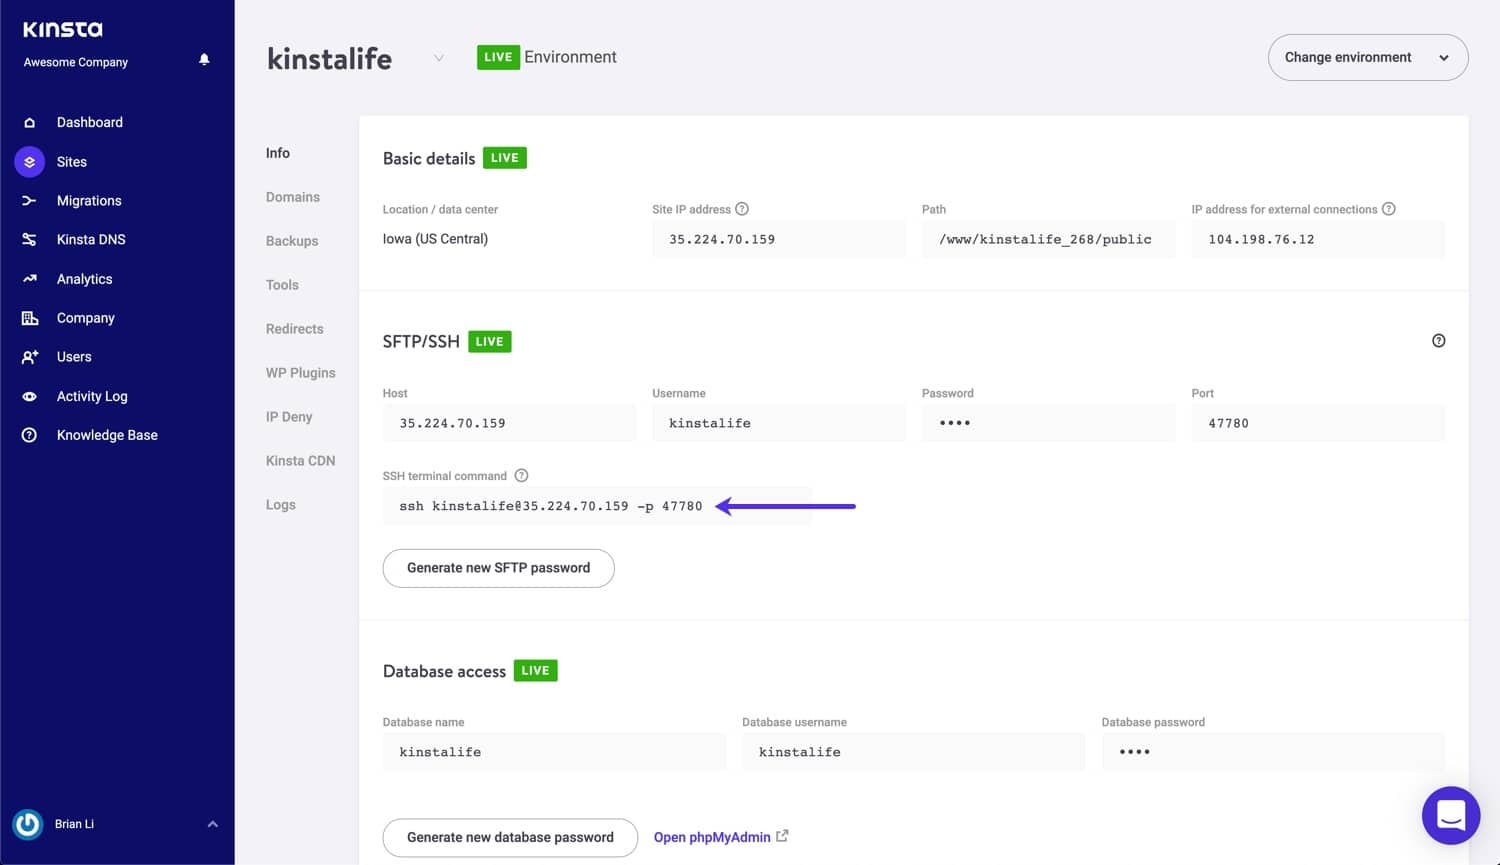
If yous are using another web host or server provider, the SSH details can typically exist found in your dashboard every bit well.
After you take found the login details, you lot can log in with the following SSH command.
ssh [email protected] -p port With the example login details below, the SSH terminal command would be ssh [e-mail protected] -p 24910. If yous are not using public key authentication, you lot will besides be prompted for the SSH password after executing the login command.
- IP Address: 146.148.59.197
- Username: kinstasite
- Port: 24910
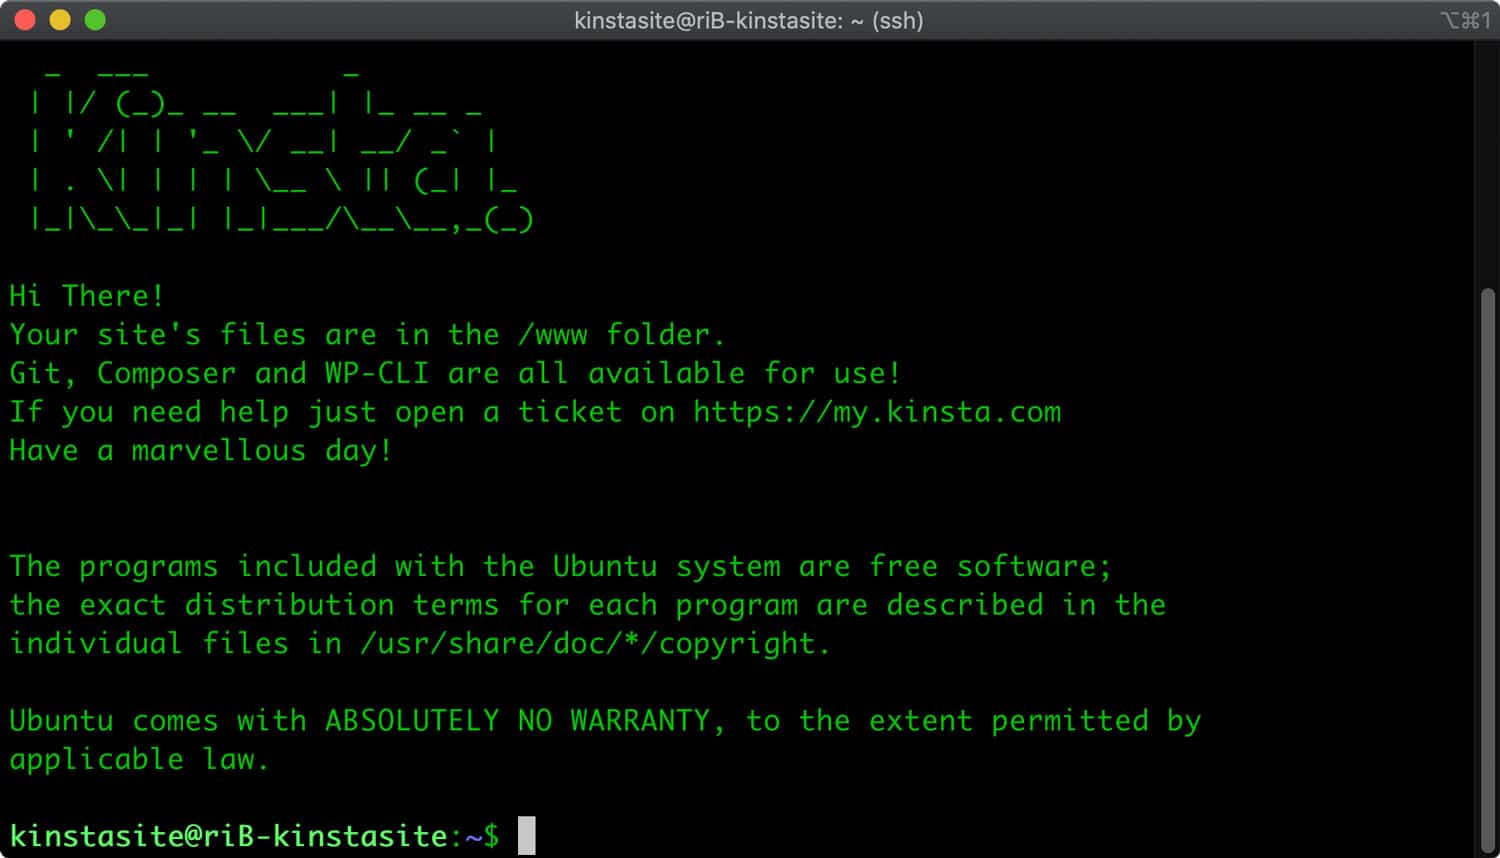
After a successful SSH login, you should run into something similar this in your Terminal window.
Step ii – Install the Unzip Parcel (Optional)
In some Linux distributions, the unzip package is not installed by default. Kinsta users practice not accept to worry about installing the unzip packet considering information technology is automatically installed on all our site containers. If y'all are managing a server that does not take the unzip package installed, y'all can employ the following command to install it – notation that sudo level permissions are required.
Ubuntu and Debian
`sudo apt install unzip`
Subscribe Now
CentOS and Fedora
`sudo yum install unzip`
Stride 3 – Unzip the Null File Using Terminal
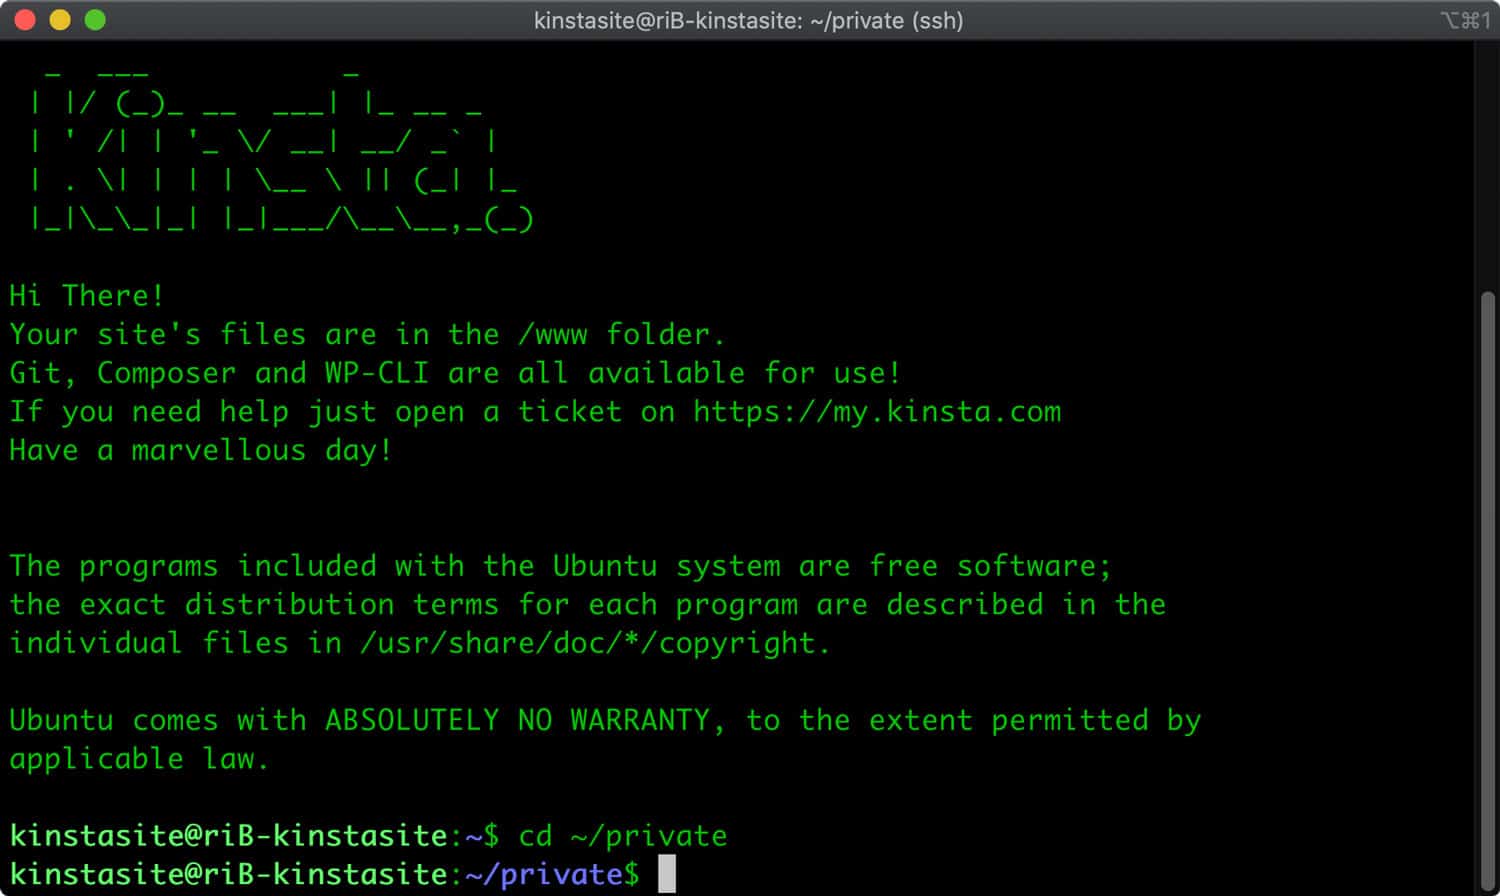
The adjacent step is to navigate to the ZIP file and unzip information technology. To navigate to the correct binder, we tin can use the cd control, as shown below.
cd directory Nosotros uploaded our backup.zip file to the ~/private directory, so we'll utilize the control below.
cd ~/individual Notice how our Final prompt shows the ~/private directory now.
We can use the ls command to list the files and folders in the current directory. In the screenshot below, you tin can come across the backup.zip file in our ~/individual directory.

There are two ways to unzip a ZIP file. You tin either unzip it to the current directory or a different directory.
To unzip the file to the current directory, utilize the command beneath.
unzip your-file.cypher To unzip the file to a dissimilar directory, employ this command instead.
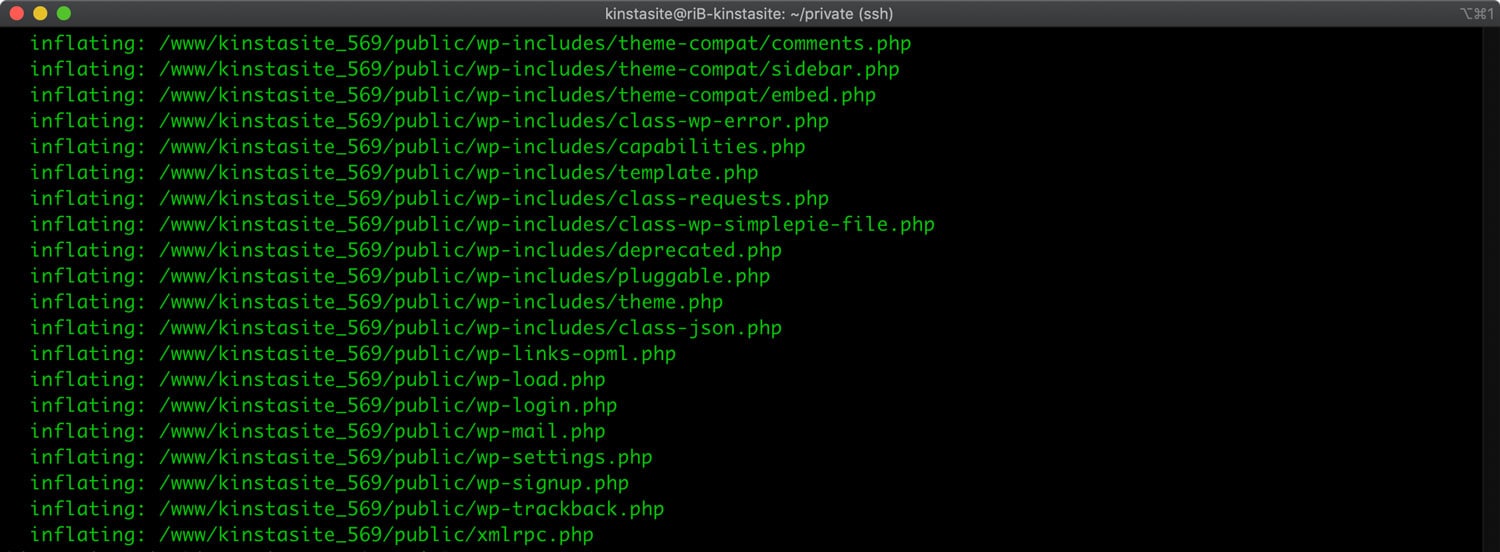
unzip your-file.zip -d directory For our backup.nothing file, nosotros want to unzip it to our ~/public folder, which tin can be done with the command below.
unzip backup.zip -d ~/public After running the unzip command, you should see a series of lines that showtime with "inflating". This indicates that the unzip process was started successfully.
After the unzip procedure is finished, navigate to the destination directory with the cd command, and list out the files with the ls command to verify the unzipped files are in the right identify.

If you would like to remove the original ZIP file later on unzipping it, y'all tin use the rm command like this.
rm /path/to/your-file.naught In general, if you lot are dealing with a Zero file that is over l MB in size, unzipping it on the server instead of locally on your estimator will usually exist faster. But there's more than to unzipping Nada files as using SSH and Terminal is useful for a number of use cases beyond restoring backups.
Summary
Being able to unzip a Zip file in Terminal using SSH tin can speed upwardly your workflow dramatically – especially if you lot are uploading a large number of files in bulk. With the SSH commands listed in this post, you'll be able to rapidly restore backups and move content without waiting for long SFTP uploads.
Salvage time, costs and maximize site performance with:
- Instant aid from WordPress hosting experts, 24/7.
- Cloudflare Enterprise integration.
- Global audience achieve with 29 data centers worldwide.
- Optimization with our built-in Application Functioning Monitoring.
All of that and much more, in one program with no long-term contracts, assisted migrations, and a thirty-day-money-back-guarantee. Check out our plans or talk to sales to find the plan that's right for y'all.
Source: https://kinsta.com/knowledgebase/unzip-zip-file/